Nail Tutorial: Under The Sea.
It's been a while, I have not had the darndest time to update my blog regarding the nail art. Sorry, the month of March has been an hectic one. I promise to get the month of April updated with loads of nail ideas. =) I shall try that is.
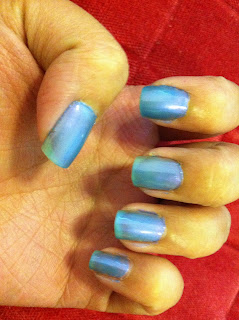


1. Base Coat
2. Lightest Blue Base Color.
3. A Shade Darker Blue
- Using a cotton bud/ sponge you want to sponge on little bit of darker blue on the tip area.
4. Darkest Shade of Blue
- Again, using the cotton bud/ sponge dab on the darkest shade of blue. Now this can be messy, don't have to fill in the gaps and so on. It's ok if it looks messy.
5. Green Seaweed?
- Using a green you want to draw on some seaweed. =) Remember this is not supposed to be perfect straight lines. make them as curvy as possible.
6. Corals?
Now for the Corals, you don't need to paint them on all 5 fingers of yours. Instead you can just paint them on 1 or 2. I used a light pink and drew on the corals. Remember it's not supposed to be perfect!!
7. Konad!
- Konad is such a big help! I can't draw on the fishes and all.. But I can stamp it on! So use your Konad and stamp on the little fishes in the sea. =)
8. Add a little bling.
- Because I like it shiny. =p
9. Top Coat
- YOUR DONE!!
How simple can Konad be? And there.. After cleaning the side of my nails. I got my Under The Sea Theme done. =) Enjoy!


Comments